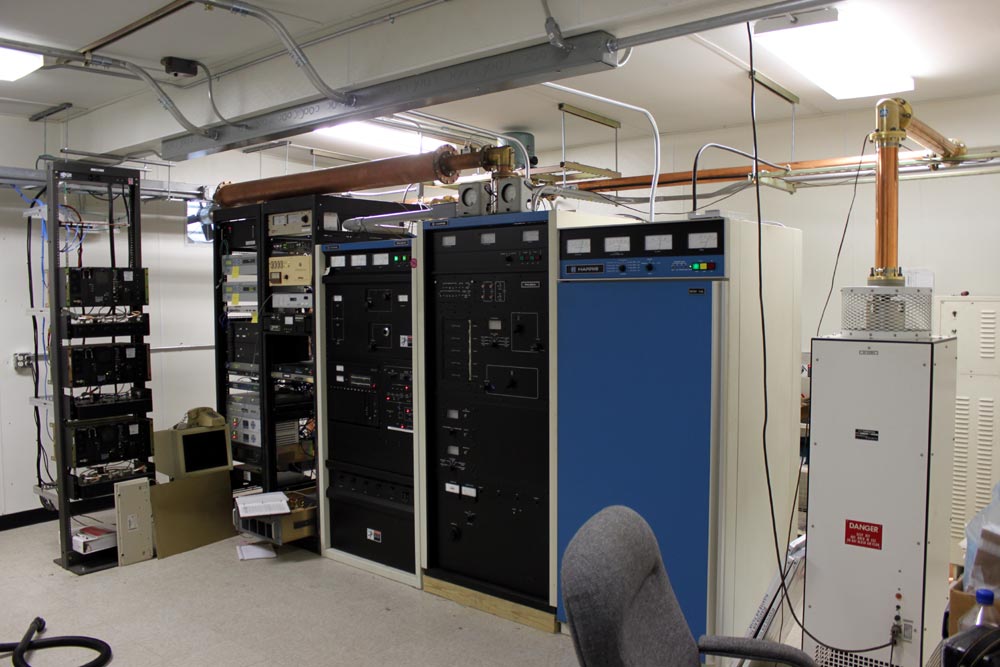
They say the first thirty years are the hardest, perhaps it is true. This Harris MW1A transmitter turns 31 this year:
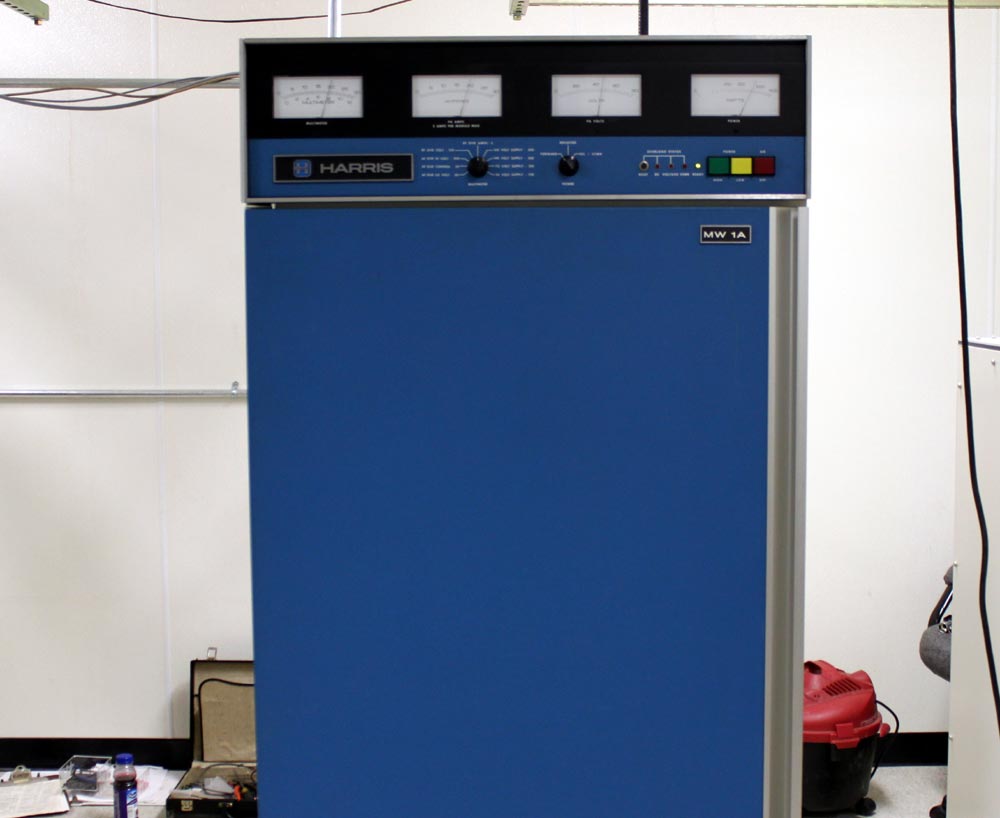
Truth be told, these are not bad units. They have some quirks, however, the overall circuitry is simple, the design is simple enough and parts for repair are readily available. They require regular infusions of RF transistors, but those are easy to change and are inexpensive to buy off the shelf from places like Mouser or Allied.
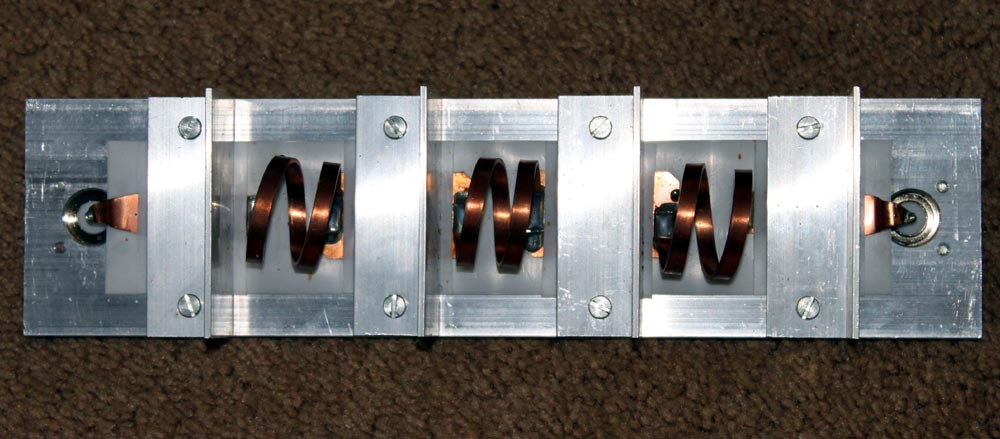
It is on the air as the main transmitter for WINE-AM in Brookfield, CT. This is Harris’s first solid-state AM transmitter design, based on the work of Himmler Swanson. This is not a PDM transmitter, rather, each module has RF transistors and audio transistors. The output of all twelve modules is combined for a carrier output of 1,000 watts with +125% modulation. Harris calls this PSM (Progressive Series Modulation), which is sort of high-level modulation.
This is also the only transmitter that I know of where blown fuses can cause damage to the RF devices.
The RF output transistors and audio transistors are still available from Harris. Non-OEM parts for this include the 2N5038G for the RF transistors and the MJ15011 for the audio transistor. Inside the front of the transmitter is a row of incandescent light bulbs that glow increasingly as the various transistors go bad. At 1,000 watts carrier power, the ratio of PA volts to PA amps is 52.5/22.5 respectively. If that ratio is off by any measure, there is a problem.
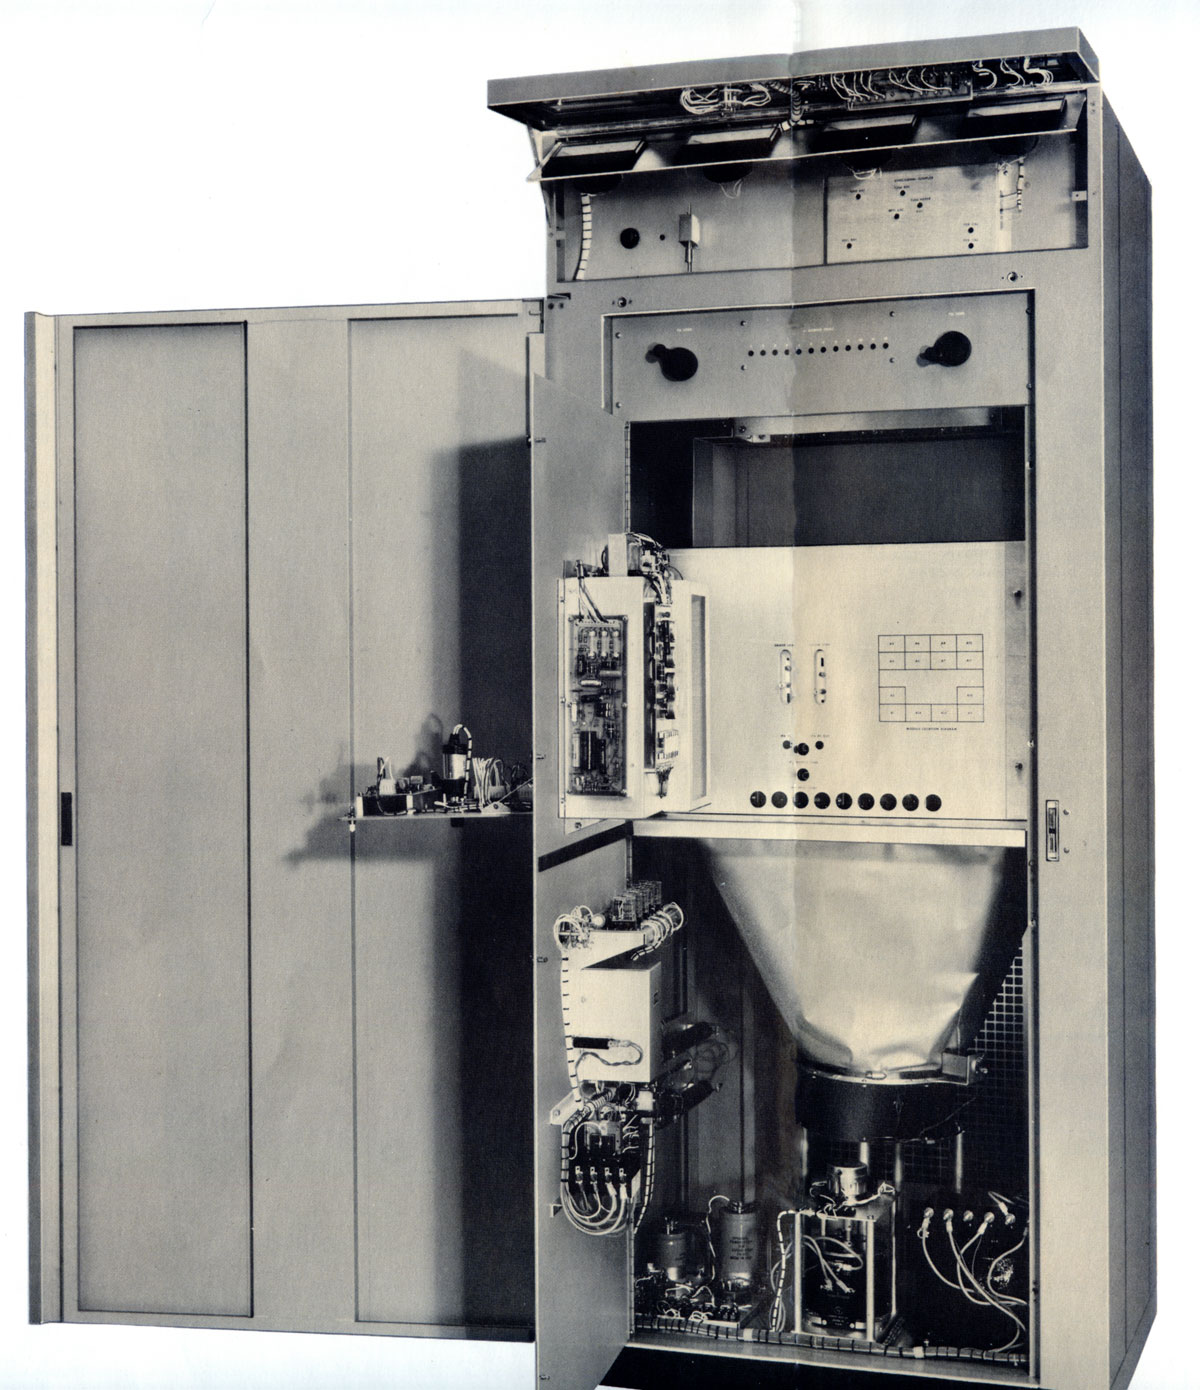
Original sales brochure for the MW1 (no A):

Entire brochure is available here.
The other thing with this transmitter is it is very sensitive to any kind of VSWR. Any change in the output impedance will quickly make itself apparent. My Harrisburg MW1A had two ATU settings, one for winter and one for summer. It was a slightly tall tower on 1230 KHz, thus any change in the ground system (e.g. snow cover) would upset the tower base impedance.
The other thing that goes bad is the large Rotron fan at the bottom of the cabinet. They go bad about every 10-15 years or so.
The owner has spent some money on this particular unit, rebuilding and replacing several modules with new transistors, etc. Will it last another thirty years? Depends on if the RF and audio devices remain in production.