This is an adjunct to my previous post on creating a Stratum 1 NTP time server with a Raspberry Pi. I finished this project about a year ago, and I have to say it has been running flawlessly since then. I thought that perhaps the inexpensive GPS module designed to work with drones might not hold up. But it has.

Wouldn’t it be nice to use this time source, not just to set hardware clocks but also display the time in varous places? Yes, yes it would.
Since most of my ideas are not original, I figured a quick internet search may shed some light on how to proceed. Keith, G6NHU did exactly this a year ago or so. His project can be viewed here: https://qso365.co.uk/2023/05/how-to-build-a-shack-clock-using-a-raspberry-pi-and-a-7-touch-display/
As I suspected, with a few more configuration steps, this NTP server can display the time on the native HDMI port as well as create a simple web page available on the LAN for any computer to access with a web browser. The web server is Lighttpd, which is a low CPU load, low memory demon, perfect for an older Raspberry Pi 3.
The display I chose is a 7-inch 16×9 non-touch purchased from Amazon for $33.99: https://www.amazon.com/gp/product/B0BGXB2Y67/ (not an affiliate link)
When I created the NTP server last year, I named it ntpserver. The unit runs headless (no keyboard or monitor) so I use ssh to get into the command line. Thus, the first command is:
ssh ntpserver@192.168.1.200
Once in, always do an update:
sudo apt-get update
sudo apt-get upgrade -y
The following programs need to be added to the Pi:
sudo apt install xorg openbox xserver-xorg xinit unclutter lighttpd -y
If the OS is off the shelf Raspian, then Chromium should already be installed, but if not, then add it:
sudo apt install chromium-browser -y
Once that is done, some things need to be configured. Using whatever text editor you like the xserver so that anyone can access it. Open the Xwrapper file:
sudo nano /etc/X11/Xwrapper.config
Then add line:
allowed_users=anybody
Exit and save. Next open the xserverrc file:
sudo nano /home/ntpserver/.xserverrc
Add the following:
#!/bin/sh
#Start the X server session with no power management so the display never sleeps
exec /usr/bin/X -s 0 -dpms -nolisten tcp "$@"
Exit and save. Next open the xsession file:
sudo nano /home/ntpserver/.xsession
Add the following:
#!/bin/sh
#Start Chromium at startup
chromium-browser --start-fullscreen --window-size=800,480 --disable-infobars --noerrdialogs --incognito --kiosk http://localhost
Exit and save. Note the display size can be configured to any screen resolution. This affects the HDMI port, not the web page. The 7-inch Raspberry Pi monitor that I purchased from Amazon has an 800 x 480 screen resolution. If you are using a different screen resolution, change as needed. Next open the clock.service file (it will be created when you save the file):
sudo nano /etc/systemd/system/clock.service
Add the following:
[Unit]
Description=Clock
After=network-online.target
DefaultDependencies=no

[Service]
User=clock
ExecStart=/usr/bin/startx
Restart=always
RestartSec=10

[Install]
WantedBy=multi-user.target
Exit and save.
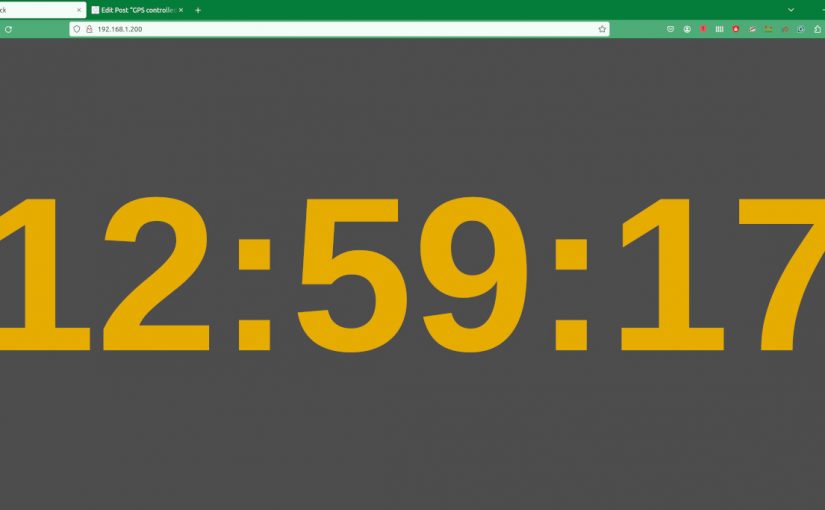
The web page that will be displayed on the HDMI port as well as served to local hosts on the LAN is a java script page. It was originally developed by Nayuki: https://www.nayuki.io/page/full-screen-clock-javascript You can download whatever format you like from that site (I copied the page source) or you can download a 24-hour format from Keith’s site:
cd /var/www/html
sudo wget https://qsl.net/g6nhu/clock/index.html
The colors can be edited:
sudo nano /var/www/html/index.html
The background, foreground, and font type can be changed as desired.
Next start the clock service and reboot:
sudo systemctl enable clock
sudo systemctl start clock
sudo reboot now
Here is a quick video of the web page on my desktop computer. I have the GPS monitor from the ntpserver up and running in the left upper corner. That shows the GPS data going into the Raspberry Pi from the serial port along with some scratchy WWV audio. The actual clock sync is from the 1PPS output of the GPS module.
I could see this being used as an inexpensive master clock system somewhere. With an HDMI splitter (or a better name would be Distribution Amp), this could be sent to many locations.
Now all I need to do is figure out how to get a GPS synced 10 MHz output capable of driving multiple devices.

That’s really slick! Perhaps something like this could be a good jumping off point for your 10MHz project: https://radio.g4hsk.co.uk/2015/12/14/10mhz-gps-disciplined-oscillator-and-ntp-server/