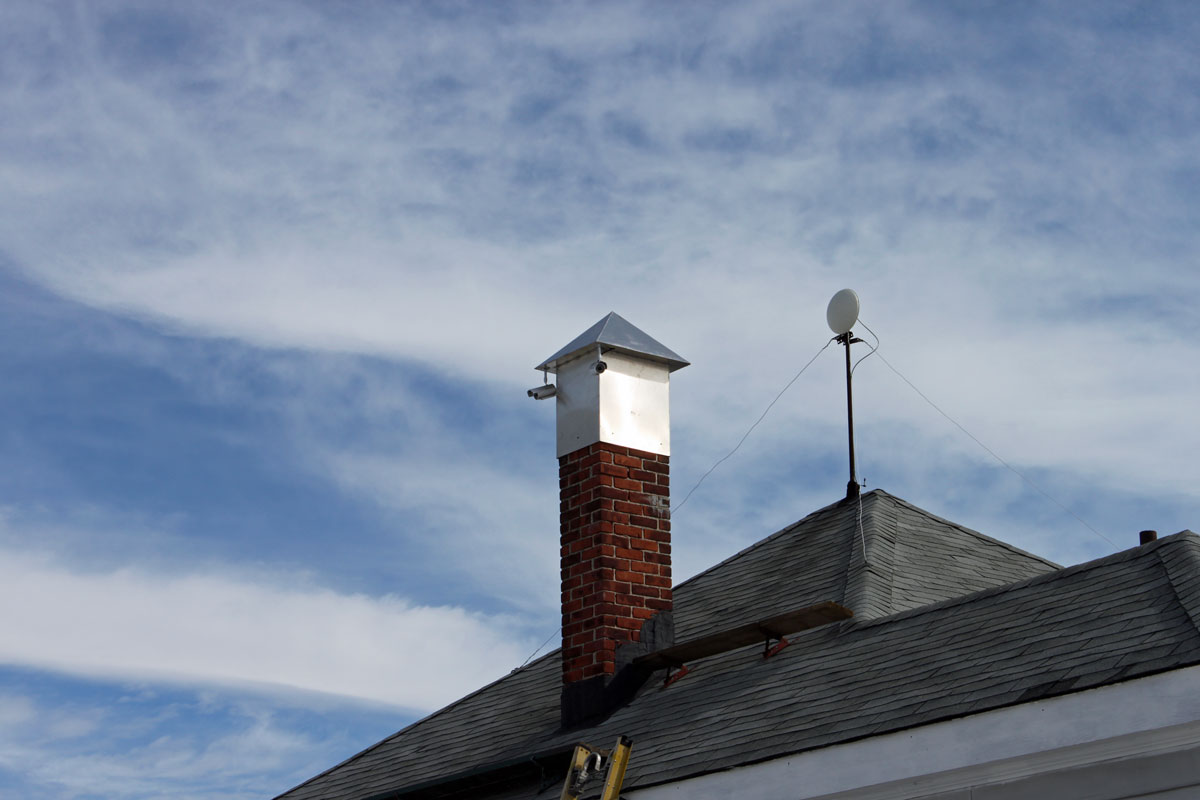
After a bit of delay, we were able to return to the WICC transmitter site to install the Wireless LAN link. The installation was pretty straightforward. The studio unit was mounted on an existing STL tower on the top of the elevator room, the transmitter unit was mounted on an existing pipe on the roof of the transmitter building.
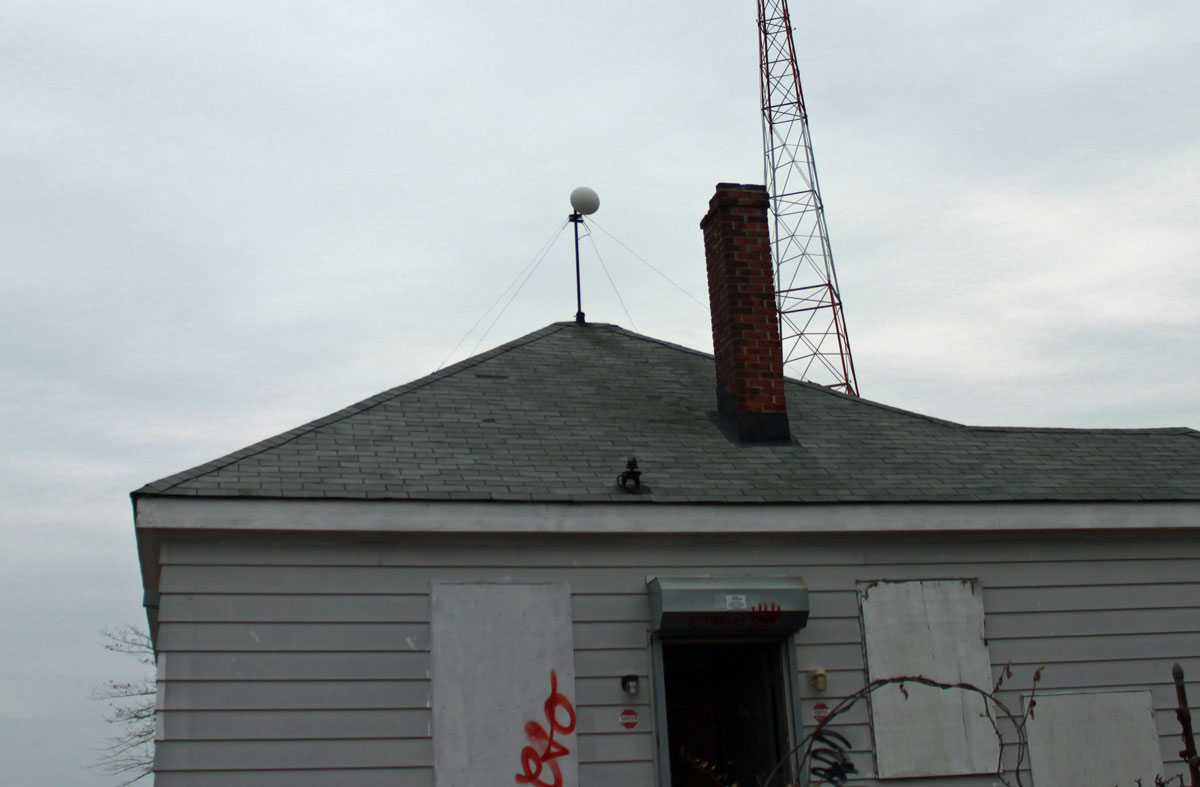
I included RADOMEs for a couple of reasons; first, there is a lot of critters around of the two-legged and winged kind. The upright two-legged critters may be attracted to the signal-strength lights at night. This unwanted attention could invite the juvenile delinquent’s bored teenagers to throw various objects found laying around on the ground at the antenna, damaging it. The winged type critter may be inclined to view the feed horn as a good nesting location. The other reason is this site gets a lot of rain, wind, ice, and snow, therefore the RADOMEs afford some protection against the weather.
Aiming the antennas was pretty straightforward, but requires at least two people. Using landmarks, we aligned the dishes in the general direction of each other. Both ends of the system were turned on and we had a -89 dBm signal path, and somewhat surprisingly, the radios linked up and my laptop grabbed an IP address via DHCP. Using the signal strength meter on the side of the antenna, each dish was peaked in turn:
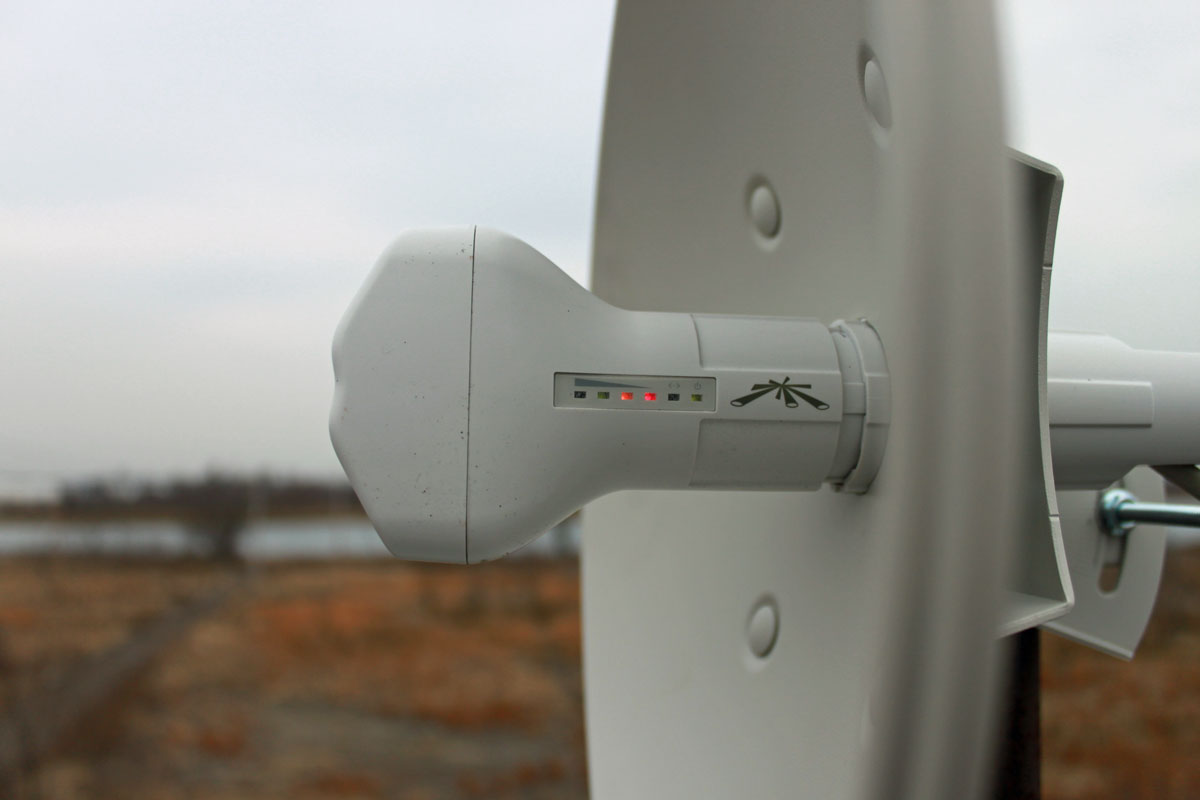
Then, somebody on either end went below and looked at the signal strength screen on the web interface while the other end peaked. In the end, we had about -65 dBm signal strength, which is somewhat less than the -58 dBm predicted. I think we can do better, so on the next clear day, I am going to peak the signal again.
The data rate initially reported was over 100 MBPS, however, once I started transferring files back and forth, that dropped to about 50 MBPS. If it is raining, that rate drops to about 35 MBPS, which is still far above what we need this link to do. As a test, I streamed a youtube video, downloaded a Windows update, loaded several web pages, and checked my email simultaneously. There were no issues with the data rate while those tasks were being preformed.
It is quite amazing to me that these little inexpensive radios can work so well. My boss thinks that they will be blown up by lightning during the first thunderstorm of the season. I don’t know. There are several of these units have been installed at mountaintop tower sites and have been working for several years without issue.
Next step, installing the IP cameras and warning signs on the fence, setting up the monitoring software, etc.
Cameras mounted on old chimney platform. This is the first set of cameras covering the south, north, and west approaches. A fourth camera will be mounted on the back of the building covering the east approach. Then, under the eves’ cameras will be mounted on all four corners of the building and the generator shed. If anything moves, it will be recorded.

The Ubiquiti products have really blown my mind. I have already replaced a couple of Lanlinks with the 900Mhz radios, and the 5.8Ghz products are amazing. Even while simultaneously streaming video from an IP cam on site, running a couple of Barix boxes in stereo PCM, I still gives me enough headroom to watch cat videos on YouTube and backup files from the studio without issue. During a recent blizzard the links didn’t even flinch. Love, love, love them.
Good grounding is your friend. ground 3x as much as you think you need and you’ll not have a twitch when the storms come by. Gound to the top of the mast, link between segments of the mast if it is the telescoping style, ground the bottom of the mast to the ground. Ground the cat5/cat6 cable at the first available point. I think there’s a theme here… 🙂 I used to put up outdoor WiFi nodes for RV parks and the like, and 9 times out of 10, if there was instability with any particular unit, it was grounding-related. These Ubiquity radios are really impressive.
Being familiar with both site locations I have to say I’m impressed that these aren’t the licensed-use version of the Ubiquiti units. My own question is will these be robust enough to handle all the traffic you had defined in your first post’s drawing? I would think the security camera stream(s) would occupy more bandwidth than desired. I know I had moved similar systems to their own network to be safe as well as to provide both systems with more than enough headroom for other traffic related to those networks.
It will be interesting to see if these do suffer from any nearby lightning strike. I seem to recall a passthrough ground block for Cat5/6 similar to the ones used in cable tv coax installations although the vendor escapes me at the moment.
@Rob, the tower section at the studio side is ground to the building steel, so that should be good. The pole at the transmitter site requires a ground, which I will install when we do the cameras.
@Kevin, I have spoken to several people off line that are using these radios for rural broadband internet. They seem to have very few problems with them
@Bill, I looked at the data required for each camera, it looks like no more than 1.4 MBPS per camera, which can be reduced even further by using H.265 video. I think there will be more than enough goodput to accommodate the cameras and then some.
Sorry to get off topic. WDTW was owned by big radio and for some reason was shut down Jan 1st and the site was torn down very fast. It wasn’t a bad signal in the detroit area. Strange but shows the state of things.
http://www.youtube.com/watch?v=1gskUrvJKT4
I think you’ll be happy. I’m carrying audio for a local station on one of our ubiquiti links, barix @ 44.1 PCM along with about 100 customers worth the internet traffic with no issues. I’m carrying 2 stations of PCM audio and traffic for a handful of internet customers over another link thats 15 miles. I’m carrying 50mbps of connectivity to a rural access point on a link thats 17.5 miles. All work flawlessly. Our links have had better uptime than the t1 that another station is still using to carry their audio (until we deploy on their tower). Amazing stuff for the price. We’re using rocket m5 + 30dbi dishes for all our p2p links, even short ones. I’ve found the nanobridge product to be good for a few miles, the 23 dbm transmit power really makes a difference compared to 27 dbm of most of the rest of the product line.
I’m awaiting electrical to finish up work for my airfiber link, hopefully I’ll have that deployed in the next week or two, I’m anxious to see how it performs, if it works as advertised, should provide a 700mbps full duplex link from our NOC to our main tower site. We have outgrown the existing link that moves nearly 100mbps.
Paul, how far is the link you’re using?
For the price of the things, I want to try them out at my Boston station. It’s about a 1.5 mile hop. Line of sight, except the top of the tx building has a few light trees looking back towards the studio. Curious at that short distance how much the trees will affect it. All I would need is 10mb/s to make it work well. Anything more would be gravy.
@Nick, trees in the path will knock down your signal strength, my predicted signal strength was -58 dB, in application it is about -68 dB without leaves being on the trees. Even so, my throughput is 70-80 Mbps consistently over a 1.6 mile path. Alignment was pretty easy, but getting the last few dB required a bit of trial and error.
In the spring time, we will have to trim some branches, I am sure.
Hello Paul,
Do you think these devices would be suitable for MPX over IP, like the ones in one of your posts : https://www.engineeringradio.us/blog/2015/01/mpx-over-ip/ ?
As long as the link had enough bandwidth, it should work. We have several of these units in service, some with path lengths of 10-12 miles and we consistently get 50 Mbps or greater. I could not really find the required bandwidth for either of the MPX over IP units, so you may want to call the manufacturer. I would hazard a guess that it would be less than 10 Mbps.