The big question; how bad is it?
The short answer; Not terrible, not great.
Short summary in a chart:
| Service | Licenses Canceled | Licensed and Silent | Comment |
| Full Power AM | 812 | 105 | Since 1991* |
| Full Power FM | 517 | 88 | Since 1991 |
| Low Power FM | 502 | 51 | Since 2005 |
| FM translator | 1677 | 138 | |
| FM Booster | 165 | 11 | Since 1991 |
*1991 was the peak number of AM licenses. It also marks when the FCC record-keeping began tracking the license status of all services.
There are 10,846 full-power FM stations, 8,374 FM Translators, 1,910 Low-Power FM stations, and 373 FM boosters currently licensed as of this writing.
According to the FCC data, the peak number of AM stations occurred at the end of 1991 with a total of 4,985. As of August 2024, there are 4,303 stations. There are 105 AM stations licensed and silent.
AM station licenses are being surrendered to the FCC at an increasing rate in the post-Covid era. I like charts. It is fun to look at raw data sorted in different ways. Fortunately, the FCC’s license management system allows one to search for various categories e.g. “Full Power AM” and “License Cancelled.”
Here is a chart by year of the number of AM station licenses surrendered to the FCC:
| Year | Licenses surrendered | States | Comment |
| 1992 | 1 | AR | |
| 1993 | 2 | FL, MS | |
| 1994 | 1 | GA | |
| 1995 | 0 | ||
| 1996 | 41 | SC, VA, GA, KY, LA, FL, NC, TX, CA, OK, AR, MT, KS, AL, PA, TN, MS, IL, MN, FL, MI, UT, ME, IA | FCC 96-218 rulemaking |
| 1997 | 33 | SC, NY, CT, AR, GA, LA, NJ, AL, VA, FL, ME, AZ, MS, MD, CO, WV, MI, CA, NC, SC, TX, VT | FCC 96-218 rulemaking |
| 1998 | 9 | PA, NC, MO, CA, WV, TX, CT, AL | |
| 1999 | 11 | CA, PA, LA, IN, NM, VA, NY, MD, TX, WI | |
| 2000 | 6 | FL, CA, VA, WV, PA | Dot-Com crash |
| 2001 | 12 | IA, NC, SC, IA, AR, ND, CA, VA, RI, OK, OH | |
| 2002 | 14 | MI, GA, TX, PA, IA, MI, AR, AK, KY, MS, MP (Northern Mariana Islands) | |
| 2003 | 15 | CA, AK, MI, PA, MS, ME, CO, GA, KY, AL, CO, VA | |
| 2004 | 34 | NC, GA, CO, MS, SC, PR (Puerto Rico), LA, MI, OH, TX, FL, AR, CA, UT | |
| 2005 | 11 | TX, GA, CA, AR, IA, PA, MI, OR | |
| 2006 | 16 | TX, PA, AR, MI, OR, MS, IL, MN, OK, WA | |
| 2007 | 9 | GA, AR, TN, OR, VA, TX, MA, MO | |
| 2008 | 4 | FL, MI, PA, AL | |
| 2009 | 7 | MI, IL, OK, OR, LA, ID | Sub-prime mortgage crash |
| 2010 | 7 | NY, VA, TX, PA, AL, WV | |
| 2011 | 32 | MS, AL, GA, VI (Virgin Islands), MD, MI, AS, TX, AR, IN, FL, TN, SC, NM, IA, NY, PA, LA, VT, NC | |
| 2012 | 25 | MS, FL, LA, TX, DE, KY, TN, IN, AL, GA, OH, PA, IL, MS, NC, MI, UT, SC. FL | |
| 2013 | 20 | MS, PA, OR, AL, MT, OK, TX, SC, NV, NM, NH, GA, TN | |
| 2014 | 22 | SC, CO, AK, AS (American Samoa), IL, AR, PA, RI, GA. IN, MA, MI, TX, NY, MS, WY, AL, MT, VA, LA, MO | |
| 2015 | 21 | AR, GA, WI, AL, NE, NV, HI, SC, NY, UT, MO, TN, KY, MA, IL, AR, AL, AK | |
| 2016 | 22 | DE, SC, HI, WI, MS, AL, OH, NV, MT, GA, NY, MO | |
| 2017 | 19 | NC, KY, CT, MO, GA, IL, TN, WY, NY, CA, OH, NH, PA | |
| 2018 | 18 | MD, KY, GA, NC, IL, GA, MS, UT, VA, LA, NY, MT, AR | |
| 2019 | 33 | AL, SC, OR, AR, TN, NC, WY, IN, KS, HI, WA, AL, IL, KY, HI, VI, VA, GA, LA, CA | |
| 2020 | 60 | MO, NE, FL, GA, LA, ID, TX, MP, AR, AK, KY, IL, AL, NJ, TN, MI, SD, MS, VA, CO, OH, SC, NM, WI, ND, AZ, OR, MD, PA, NV | Covid-19 crash |
| 2021 | 46 | MI, FL, AL, NV, GA, NM, PA, AZ, IN, OH, TX, IA, OR, CA, VA, IL, TX, TN, CA, NC, LA, OR, AZ, MS, SC, WV, WA, PA | |
| 2022 | 21 | FL, MS, AR, VA, MT, NY, KY, TN, SC, ME, NC, NM, MO, TX, GA, VT, PA | |
| 2023 | 188 | TX, SC, MI, CA, ID, IL, OR, MD, MA, NM, AR, FL, KY, OH, TN, NC, LA, AR, CO, ME, MS, GA, WA, MI, OH, PA, VA, NJ, WI, NY, HI, NH, UT, IN, MT, SC, WV, IN, GU (Guam) | The Great Cancellation of May 4, 2023 |
| 2024 | 35 | VA, AL, ME, LA, NC, MO, NY, SC, AZ, IL, NM, NV, WA, FL, TX, IN, WY, WA, KS, CA, MA, OH, NJ, AR, GA, CO, PA, VT | As of August 2024 |
A couple of things to note; there seems to be a two-year lag between any major economic downturn and a mass surrender of licenses. Covid-19 appears to be the exception. When the shutdowns came, clients canceled their advertising in mass causing a rapid end of already teetering businesses. In 1996, the FCC changed the rules on silent stations, limiting the time allowed to be silent to 12 months, after which the station license was canceled.
In 2023, the FCC performed a bit of housekeeping, canceling 188 AM expired station licenses some of which had been expired for decades. They performed the same thing for the FM band in October.
While every state and territory has at least one surrendered license, some states have more than average. Those tend to be mostly in the south; Alabama, Louisiana, Georgia, Florida, Mississippi, South Carolina, and Kentucky.
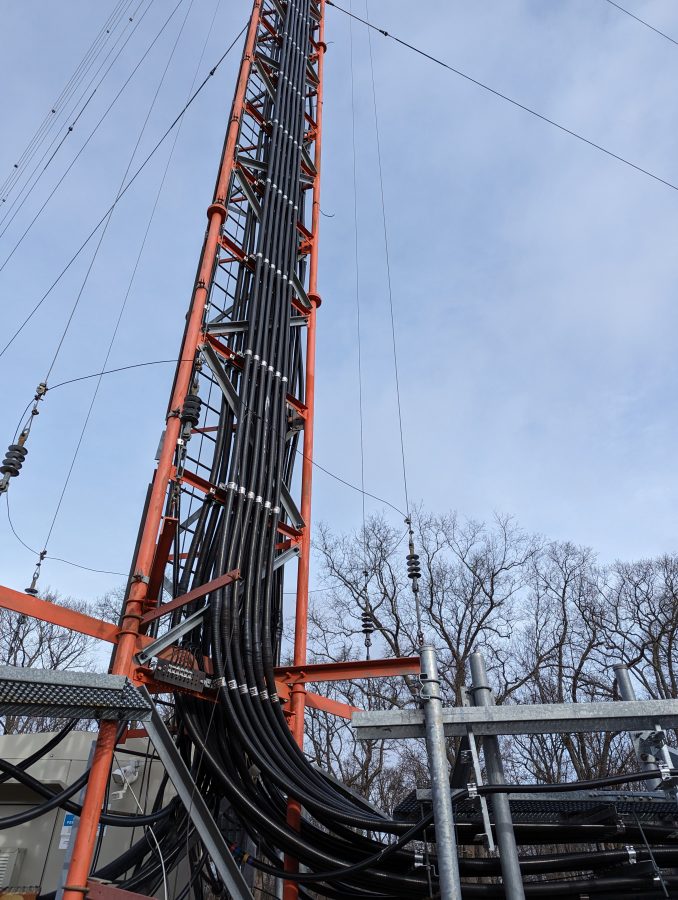
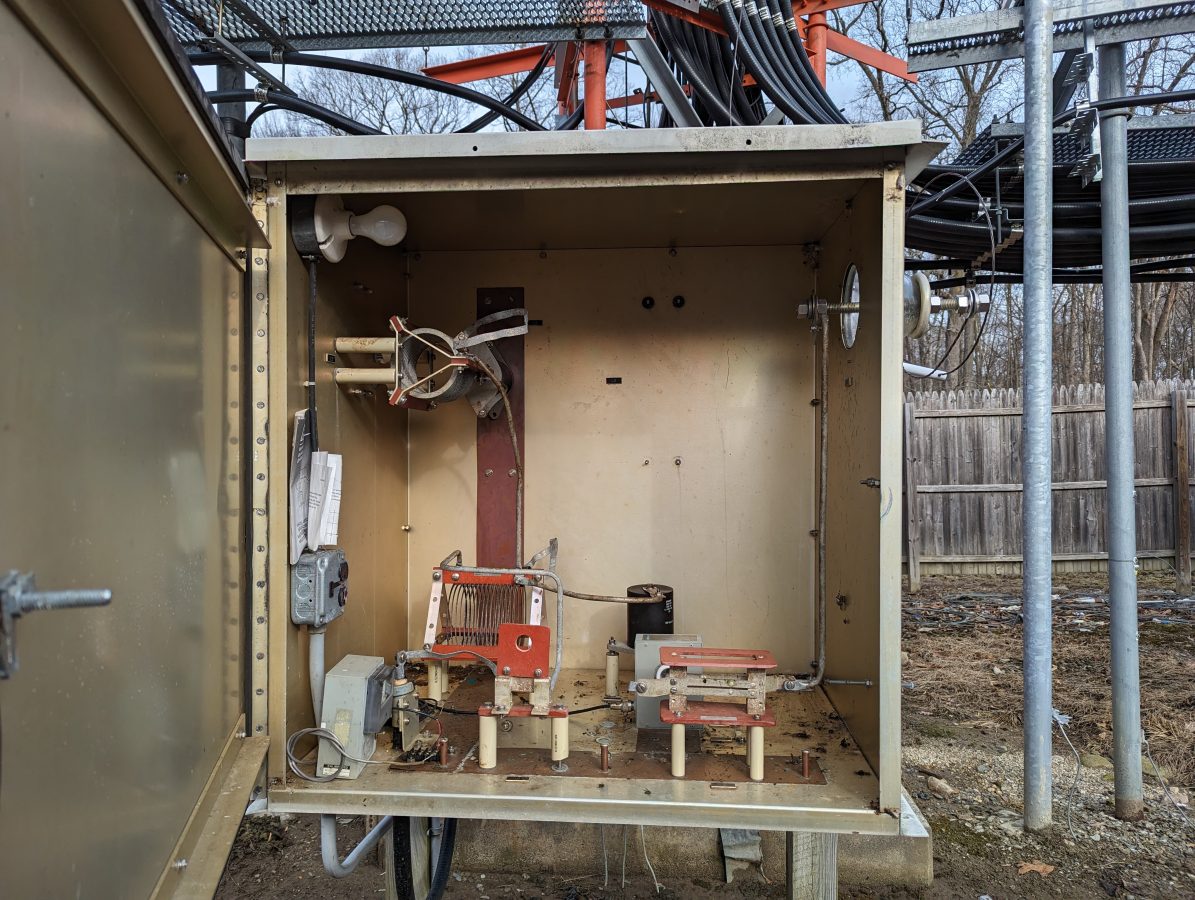
Too many AM stations these days are dead men walking. It takes effort to keep an AM station on the air. Maintenance of antenna arrays, particularly directional systems, is expensive. Selling advertising is much more difficult than it is for FM stations. Local programming is expensive. The land under an AM tower is often worth more than the license itself.
Land within certain city limits is a ripe target for developers. As more pressure mounts on station owners (taxes, zoning, etc) how long can they last before the inevitable happens?
Then there is the aging audience problem and in many smaller operations, the aging owners problem too.
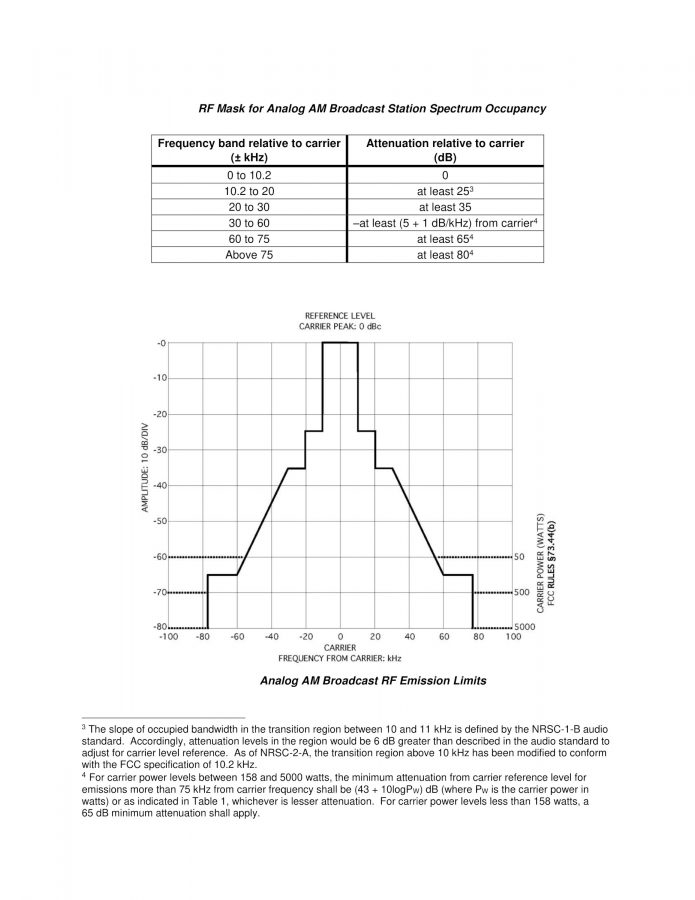
The transition to digital modulation never happened. There are no AM stations running hybrid (MA1) HD radio. There are three AM stations that I know of that are running the all-digital (MA3) version of HD Radio.
In spite of those things, AM continues on.
Perhaps one reason; AM equipment is fairly simple in design and ease of use. Take away the electrical noise problem and it works well. AM radios are still ubiquitous in most houses, cars, hotel rooms, etc.
Many AM stations now have an FM translator, which is especially helpful if the AM station has to sign off at sunset or greatly reduce power. Some AM stations are simulcasting with full-power FM stations.
Are there any technological developments that would solve some of the issues facing AM broadcasters? More economical yet still efficient antenna designs that save space? A different modulation scheme that is still compatible with full-carrier AM and will work with older receivers (9K5R3E)?
Those question will likely remain unanswered. The FCC has shown no interest in allowing experimentation on the Medium Frequency band.