Something that almost every radio station has but no one really thinks about; is the satellite downlink. I think radio stations began installing satellite downlink equipment around 1982. Before that, all network programming was carried hither and yon via Ma Bell’s extensive terrestrial microwave network.
Those early dishes were almost always Scientific Atlanta 9000 series 2.8-meter antenna system, which went with the SA 7300 DATS satellite receiver. Fast forward 31 years and things have changed. The satellite constellation is now spaced at one degree and those old SA 9000 dishes are not one-degree compliant.

Therefore, when it came time to re-aim a dish at AMC8, something new was required. A Prodelin 1374 3.7 meter center-fed C band dish was ordered up.
The first thing to do is look at the dish specifications and decide if the suggested mounting procedure is a good one. The soil in this area is sandy loam. The mounting design calls for a six-inch schedule 80 steel pipe at least six feet into the ground. This calls for renting an excavator, digging a six-foot deep hole, buying a 36-inch sono-tube and a 16-foot piece of 6-inch schedule 80 steel pipe, and a couple of yards of concrete from a truck. This work is all being done on the ground system for the WDCD antenna array. All the while, abandoning the old pad and dish in place. Seems like a lot of money and wasted materials. Reusing the old pad and part of the old mount made more sense. I did some rough calculations on paper regarding wind forces, this was the results:

The maximum static force is 1,555 N on the back bolts of the mounting ring into the concrete pad. Maximum wind force is 5,603 N, and a maximum wind from bearing 76° T will exert a force of 7,158 N or 730 Kg force on the back bolts of the mount. The concrete that the mounting bolts is embedded in will withstand 4,267 Kg of force at six inches deep. The the existing pad and 3/4 inch J bolts are well within their rating to handle this load, so it seems like a good design. Putting that to practical use:
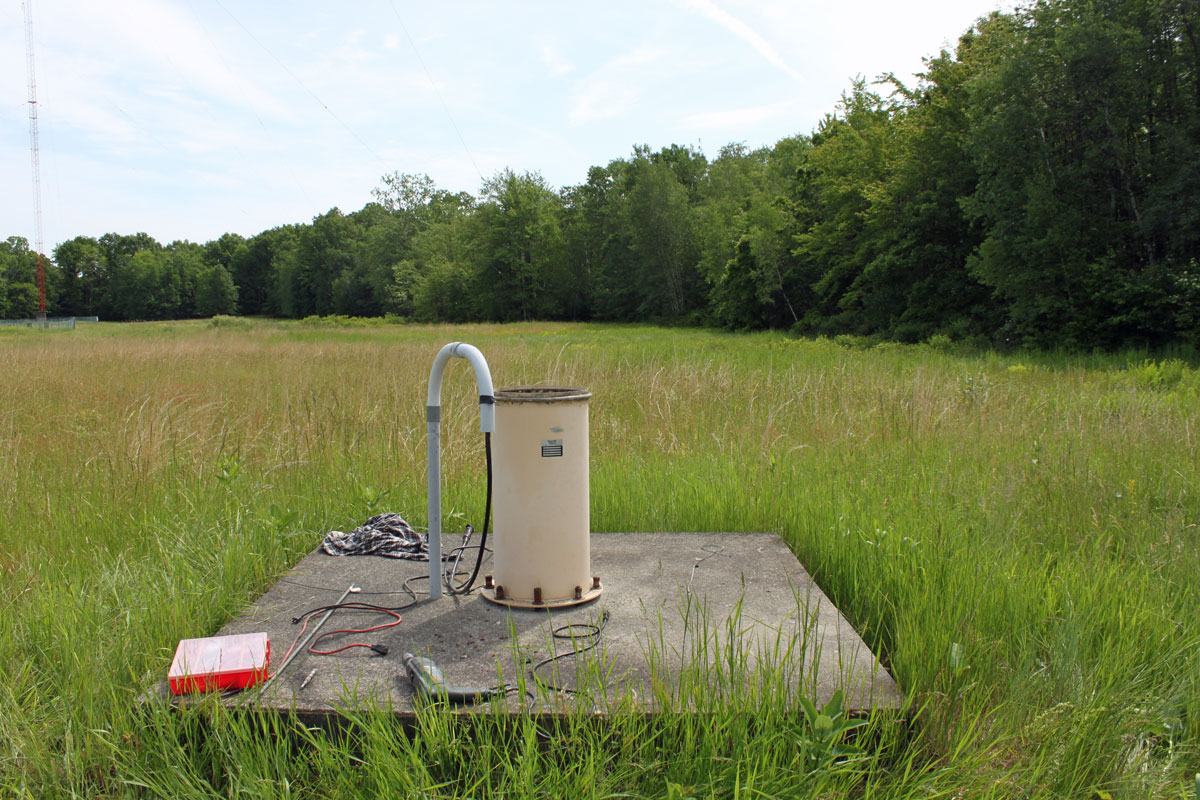
First, we unbolted the azimuth mounting ring and removed the old dish, leaving the bottom of the mount. I drilled down 6 inches into the old concrete pad and inserted 1/2 inch re-bar. These re-bar are somewhat diagonal toward the center of the tube towards the new mounting pole.

Then, we placed the 6 inch by 8 foot schedule 80 pipe in the center of the tube and attached it to the tube with 1/2 inch all-thread. We used the all thread to adjust the 6-inch pipe to be vertical.
Next, we filled the old mount up with 4,000 PSI (280 Kg/square cm) ready-mix concrete and let it cure for one week.

While that was curing, I bolted the new Prodelin 1374 dish together on the ground. Follow the directions closely on this one, there are many pieces of hardware that look the same and are almost the same but will not work if exchanged.
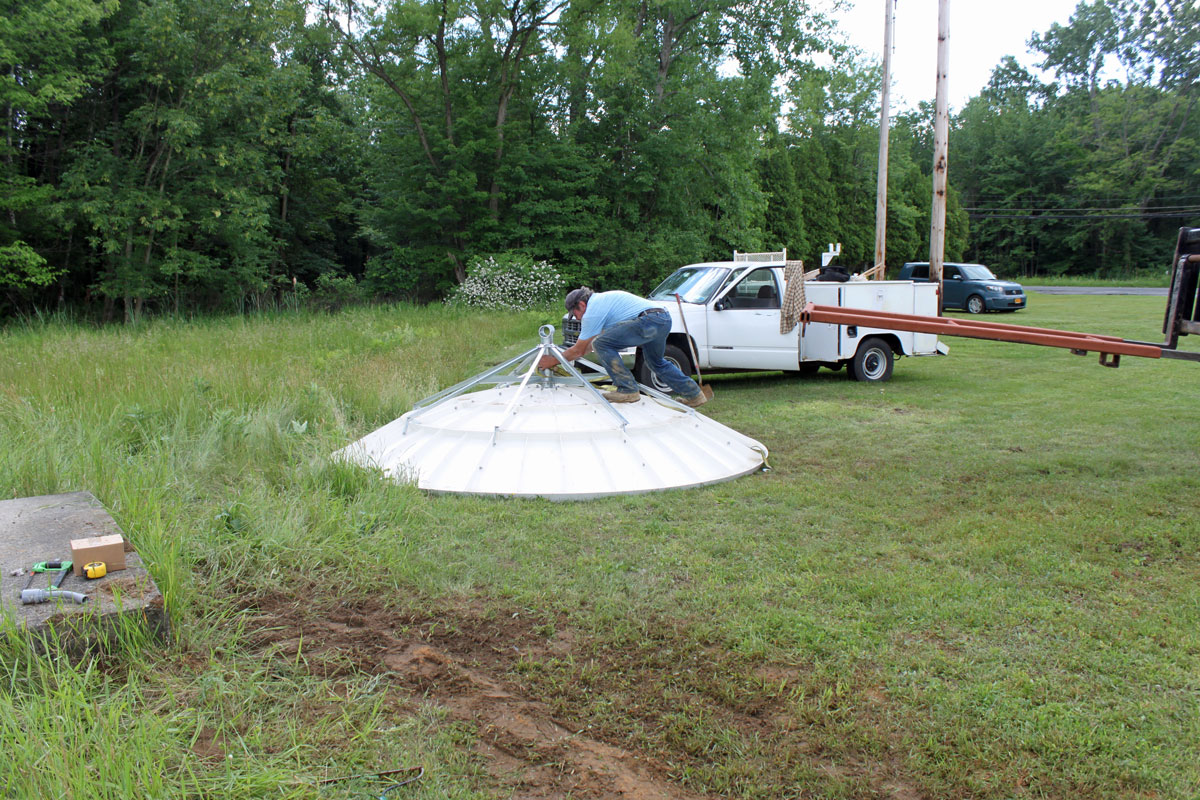
We used a loader with a lifting bar on it to sling the new dish into place. I was going to video tape this evolution, but we were short handed and I ended up helping bolt the dish on the mount once it was placed there.
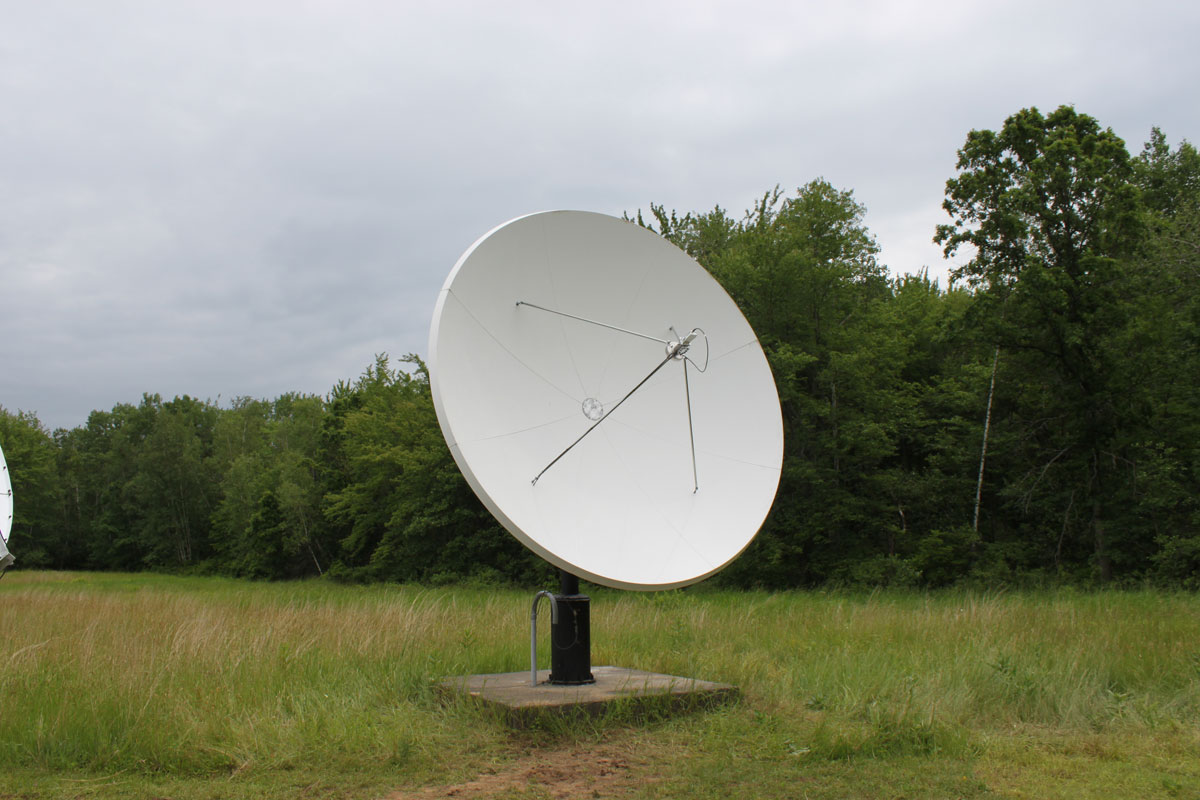
Once the dish was mounted, I installed the feed horn and LNB.

Then there was the aiming; this dish is pointed at AMC-8, for which I found this information from dishpointer.com most helpful:
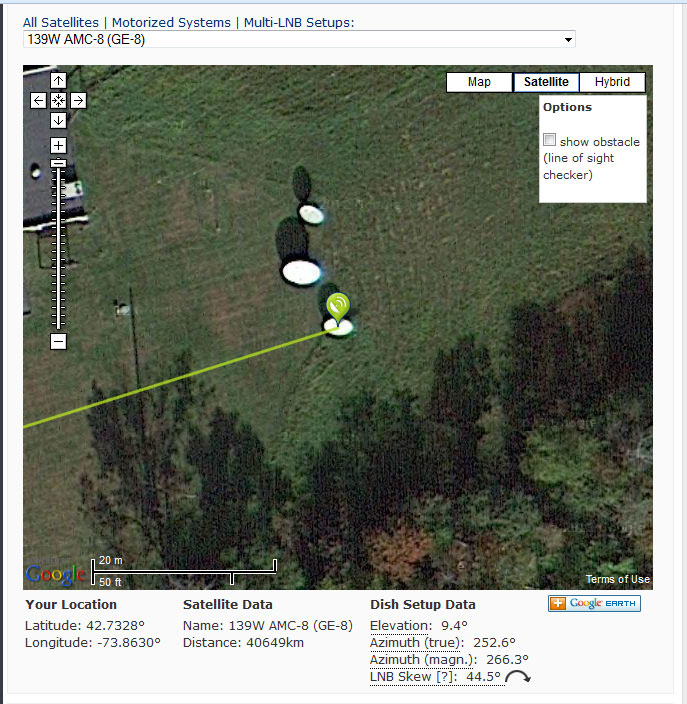
This is a crowded neighborhood and finding the right satellite took a bit of trial and error.