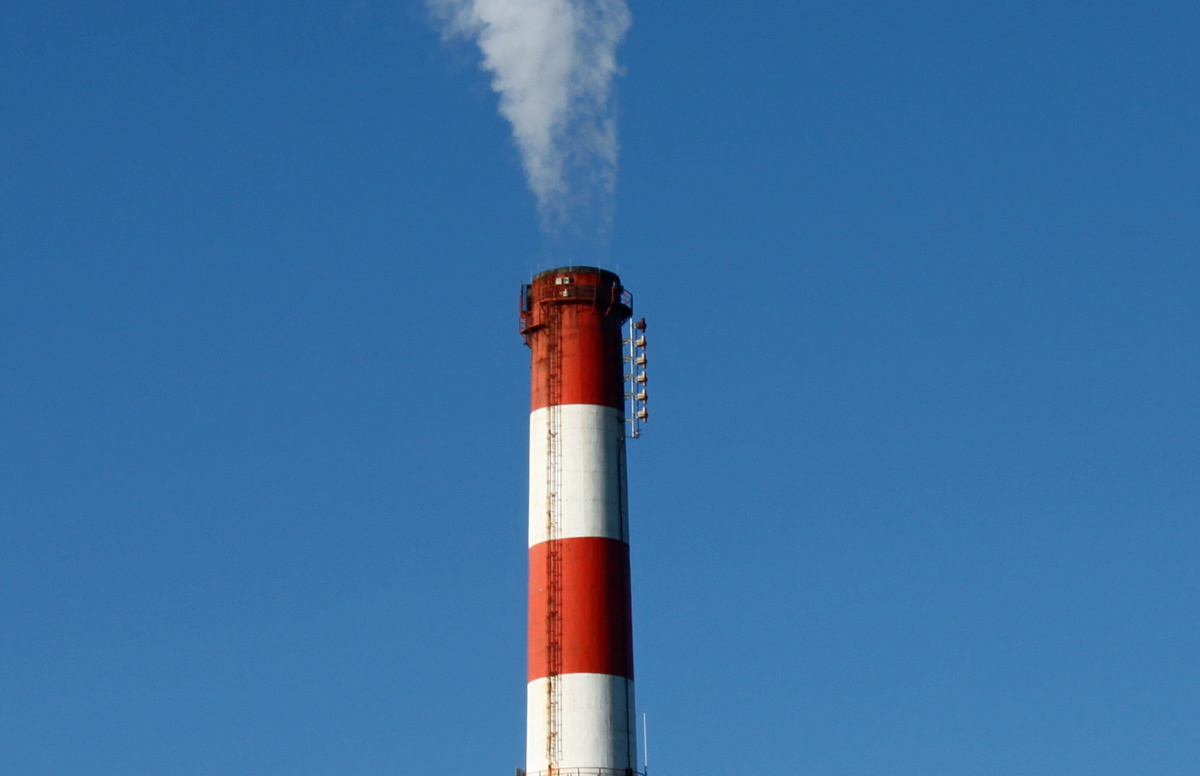
WEBE is fairly unique in that its antenna is mounted on the side of a 500-foot smoke stack. I took a few pictures last winter:

This is a close-up of the Antenna:
Here is an even closer view from a different angle:
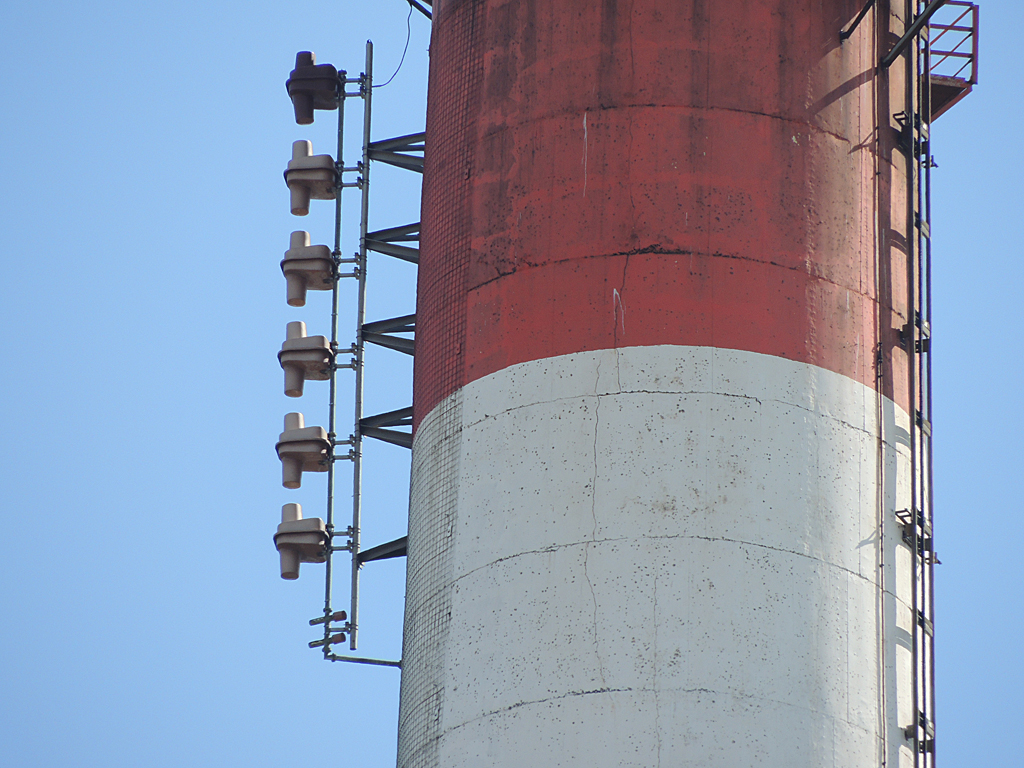
From this angle, one can see the mounting brackets and the wire mesh reflector installed on the smoke stack. From the first picture, one can see that the 400 MW PSEG coal fired power plant puts out a lot of combustion products when on line. Combustion is an exothermic chemical reaction that looks like this:
Hydrocarbon Fuel + Oxidizer + Nitrogen → Heat + CO2 + H2O + NOx
Included in this are any trace elements that are found naturally in the coal that is being burned. These include things like Mercury, Nickel, Uranium, et cetera. These trace elements can concentrate around the smoke stack because they fall out of the particulate quickly and these plants burn a lot of coal. The above picture was taken on a very cold day, most of what is coming out of the smoke stack is steam.
The issue for the radio station is when the particulate matter accumulates on the antenna, effectively shorting it out. The solution was to place the RADOMES around the elements and then constantly purge the RADOMES with nitrogen. Thus, this liquid N2 tank is vital for the operation of the radio station:
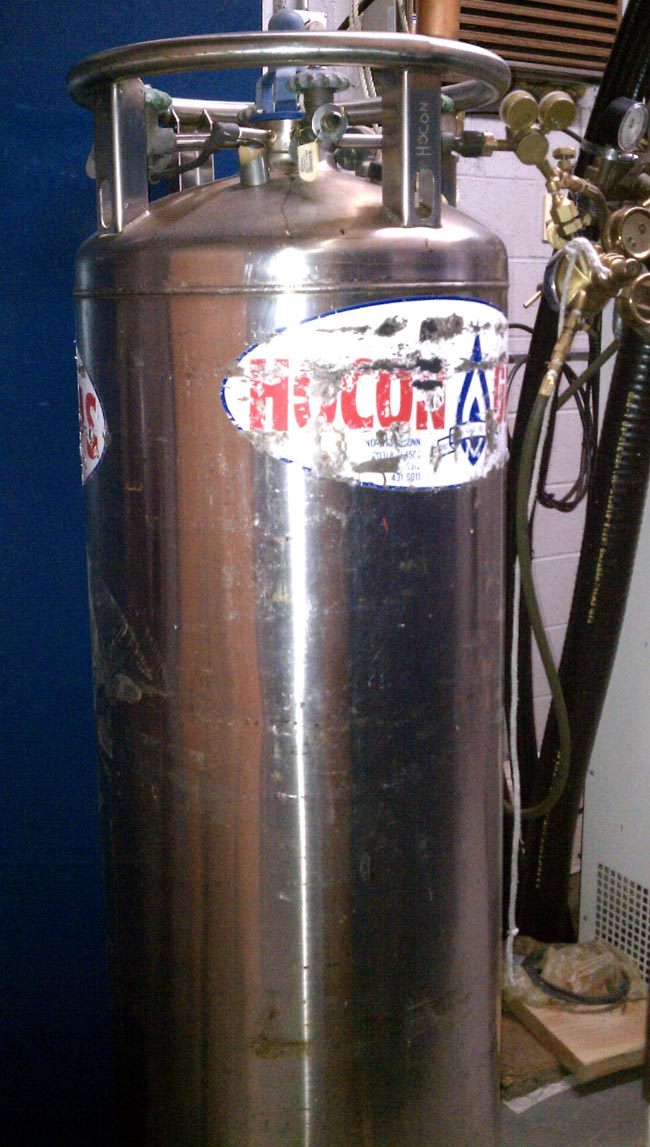
Each element of the antenna has a small hole in the feed line. N2 is fed continuously into the transmission line at a pressure of about 1.5 inches water column which then purges the RADOMES keeping any combustion products out of the RADOMES. The N2 tank needs to be changed out every 18-21 days and weights over 650 pounds when full.