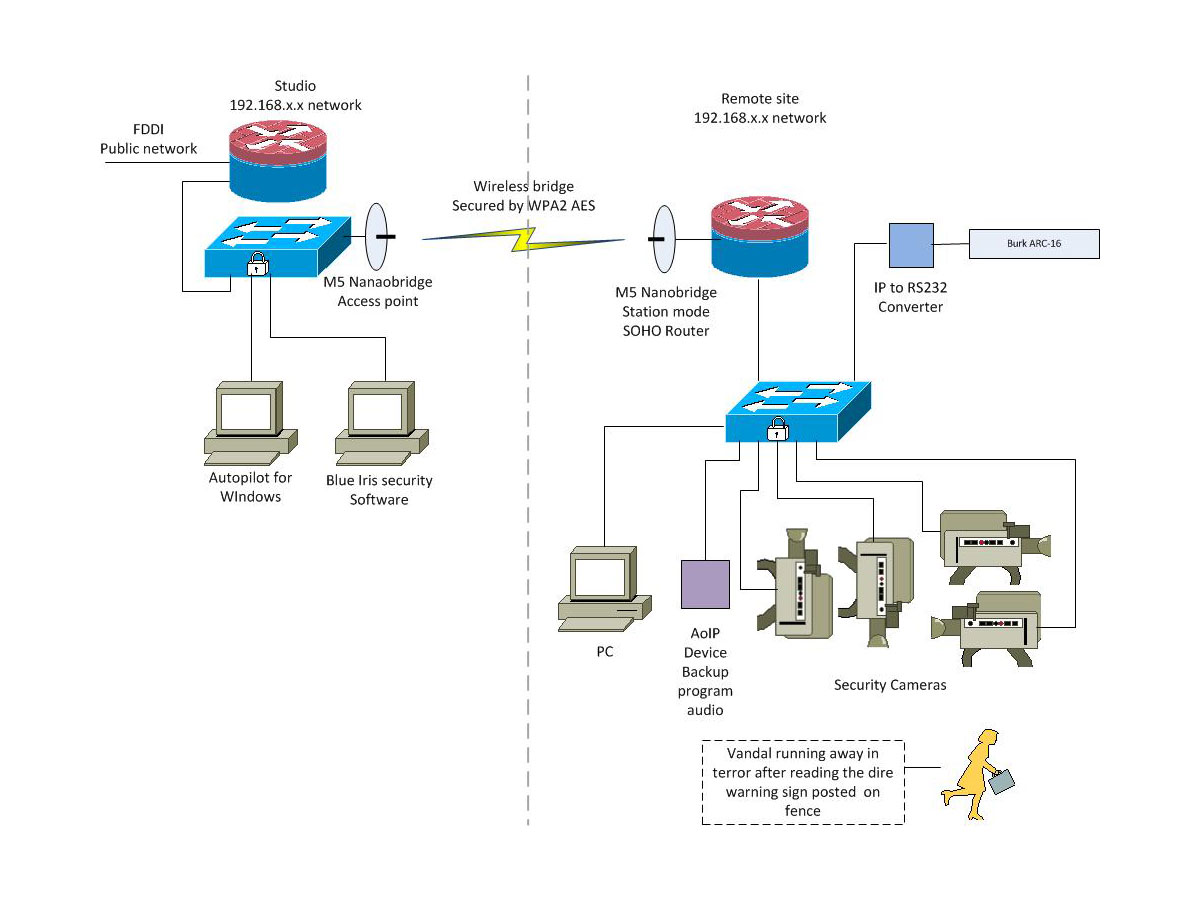
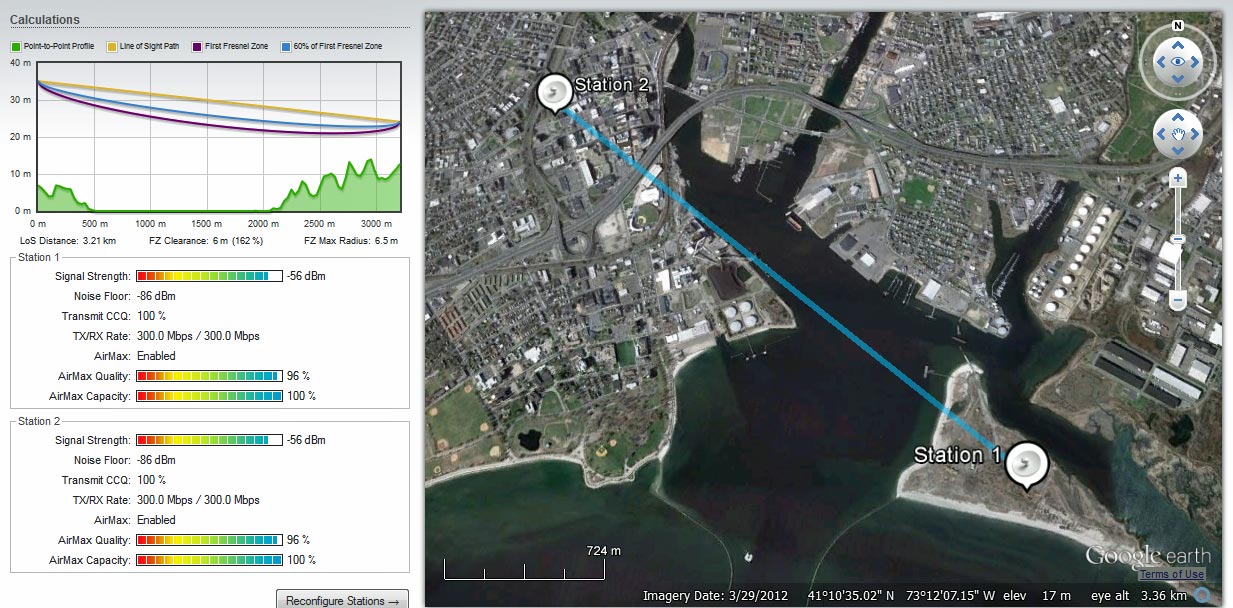
I am in the process of installing a pair of the Nanobridge M5 units as an IP network link between a transmitter site and the studio location. The path is relatively short, about 1.5 miles over mostly water. The main reason for this is to replace the analog phone lines used for remote control data and backup programming delivery to the transmitter site. One added benefit, we are also installing several IP cameras to keep an eye on the place. We purchased the Nanobridge system for $80.00 per side. The price is pretty good, but the configuration and testing are a bit intensive.
There are many versions of these spread spectrum radios, some are licensed, and some are license free. These are inexpensive, license-free links that I would count on for short paths or use in non-congested areas. In congested areas, licensed (Part 101) links should be used, especially for critical infrastructure like STLs.
Since I dreamed up this idea, I figured I should make sure it is going to work before recommending it to the powers that be. I have learned the hard way, almost nothing is worse than a failed project with your name on it. Better to over-study something than to go off half-cocked, spend a bunch of money, then realize the idea was flawed from the start. See also: Success has a thousand mothers but failure is an orphan.
Looks pretty good. 300 MB/s bi-directional which is faster than the Ethernet port on the unit. This will be set up in bridge mode with pretty robust encryption. The transmitter site side is configured in the router mode, creating a second class A network at the remote site.
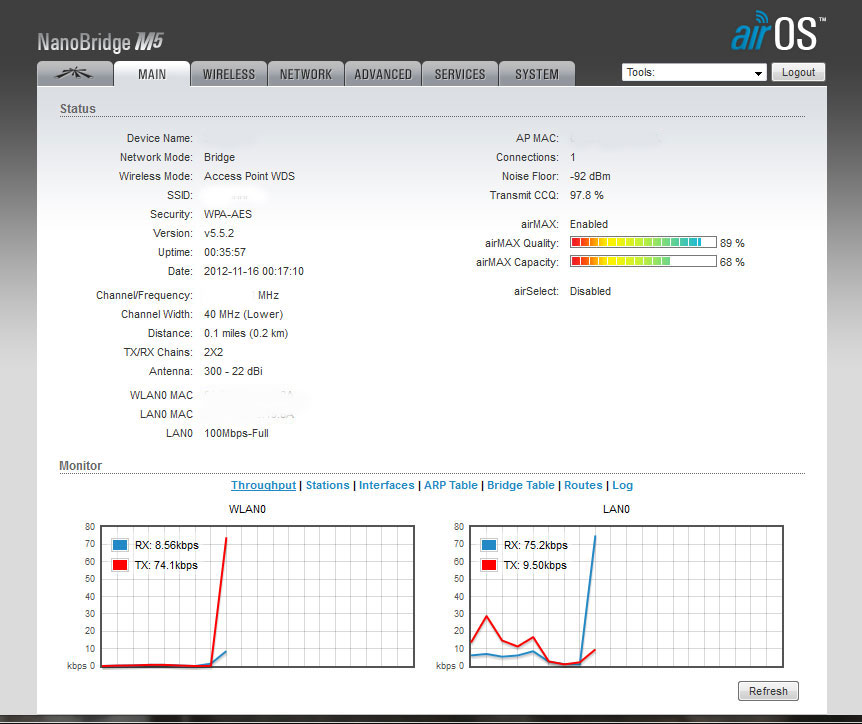
Next step, configuring the units. The Nanobridge units were set up in a back to back configuration in the engineering room. Each end comes with a default IP address of 192.168.1.20. The units were several steps behind the latest firmware version, therefore the firmware was upgraded first. The default admin user, password, and IP addresses were changed. There is no greater security risk than default user and password. The wireless security feature is enabled using WPA2-AES PSK and a greater than 192-bit access code. The unit allows for any access code length up to 256 bits. With a key of between 192 and 256 bits, the number of possible solutions is between 6.2771 E 57 and 1.1579 E 77, which should be pretty hard to crack. By way of reference, a 192-bit password has 24 ASCII characters and a 256-bit password has 32 ASCII characters.
The system requires an access point, which is configured for the studio side making the transmitter site stub network the station side. The access point is configured not to advertise its SSID, thus it should be transparent to anyone sniffing around. The WLAN is configured as a layer two bridge, which will cut down on the data overhead, as layer three framing will not need to be opened between the two units. The transmitter site network is set up with SOHO router function built into the Nanobridge. One static route is needed to get to the main network. Once the security cameras are installed, PAT may need to be used to access individual camera units via the public network.

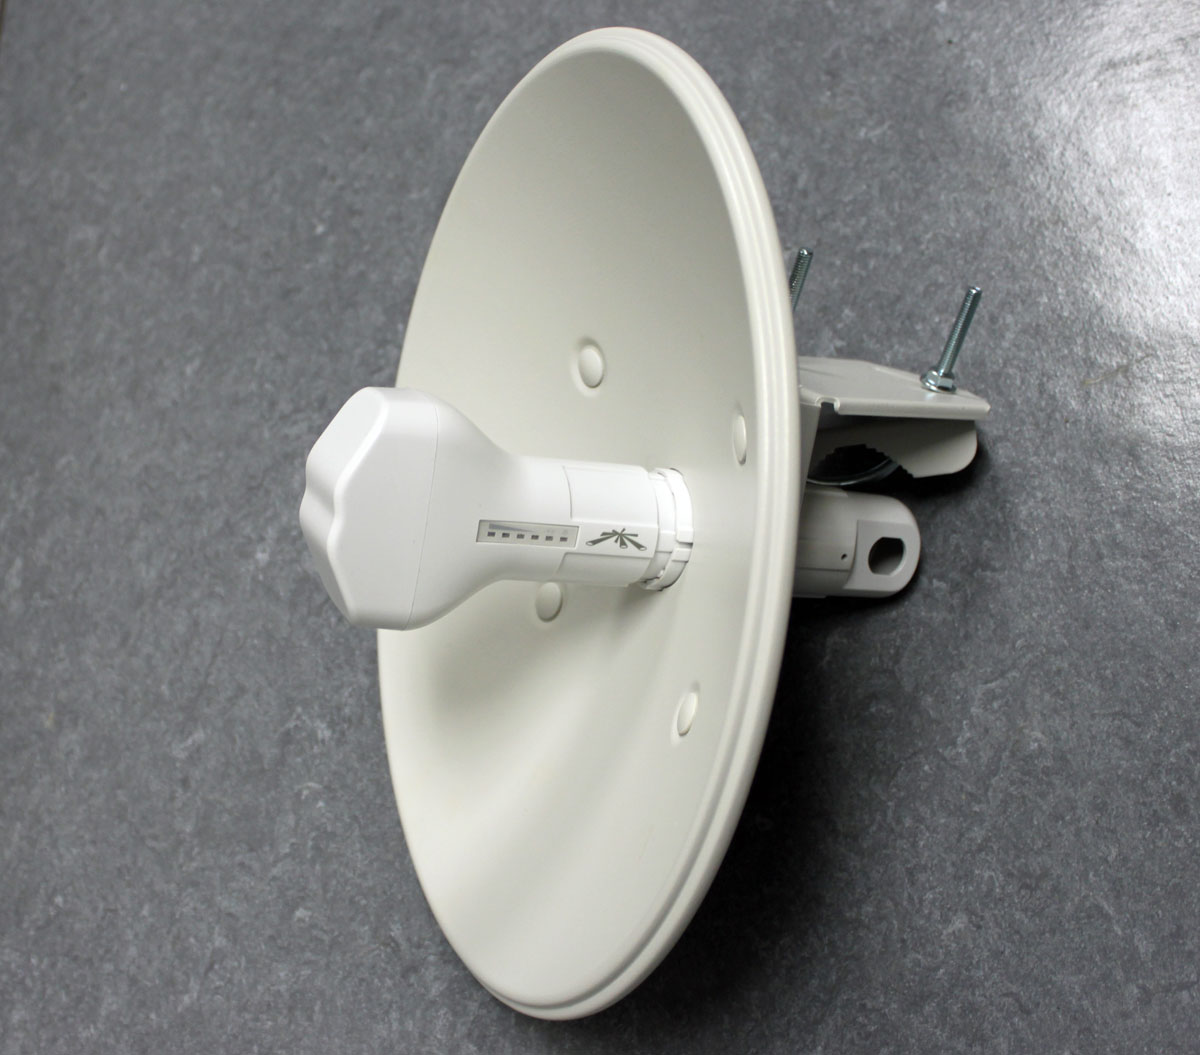
Next step, deploy the units and aligning antennas. These are 22 dBi gain antennas, which have a pretty tight beam width. Maximum transmit power is 23 dBm, or 200 mW. The transceiver/antenna unit has a handy signal strength meter on the side of the unit, which is good for rough in. The web interface has a more precise meter. In addition to that, there is a java based spectrum analyzer, which is very handy for finding open channels in congested areas. These units can also be used on UNii frequencies with special requirements.
According to the manufacturer, UV-resistant shielded Category 5e cable should be used for outdoor installations. We have several spools of Belden 1300A, which fits the bill. The shielded Cat 5 is necessary for lightning protection as the cable shield offers a ground path for the antenna unit. The antenna mounting structure is also grounded. I did not take the equipment apart to examine, but I believe the POE injector and antenna have 15KV TVSS diodes across all conductors. It will be interesting to see how these units do at the transmitter site, where there are two 300-foot towers that likely get struck by lightning often.
More pictures of the installation when it is completed.
Next step, put the system into service and monitor the link. At the transmitter site, a re-purposed 10/100 Ethernet switch will be installed for the cameras, computer, IP-RS232 converter, and anything else that may need to be added in the future. One thing we may try is an Audio of IP (AoIP) bridge like a Barix or Tieline for program audio and room audio.